2026 Best RV Solar Power Kit for Off Grid Travel?

Choosing the best rv solar power kit for off-grid travel requires more than counting panels.

The RV Industry Association reported 342,220 wholesale RV shipments in 2024. That growth means more travelers are seeking reliable power beyond crowded campsites. Meanwhile, the International Energy Agency recorded another record year for global solar deployment in Renewables 2024. Solar is expanding quickly, but RV systems remain highly personal. A 200-watt setup may support lights, phones, and a compressor refrigerator. It may struggle with an induction cooker, heater, or air conditioner.

RV electrical educator Mike Sokol offers a practical warning: “Start with an energy audit, not a shopping list.” That advice matters inside a small camper. Measure daily watt-hours, battery capacity, roof shade, cable length, and controller limits. A shaded panel can underperform beside a bright one. A thin cable can quietly waste energy through voltage drop. These details are easy to miss.

This guide compares panel output, lithium battery storage, MPPT controllers, inverter ratings, installation quality, and real-world portability. It also examines data from the RV Industry Association, the IEA, and manufacturer specifications. No kit is perfect. Weather changes. Appliances surprise you. Published capacity can also look better than field performance. The strongest choice is not always the largest package. It is the system that matches your travel habits, charging time, and tolerance for compromise. Expect useful answers, but question every advertised number.

2026 Best RV Solar Power Kit for Off Grid Travel?

Understanding RV Solar Power Systems for Off-Grid Travel

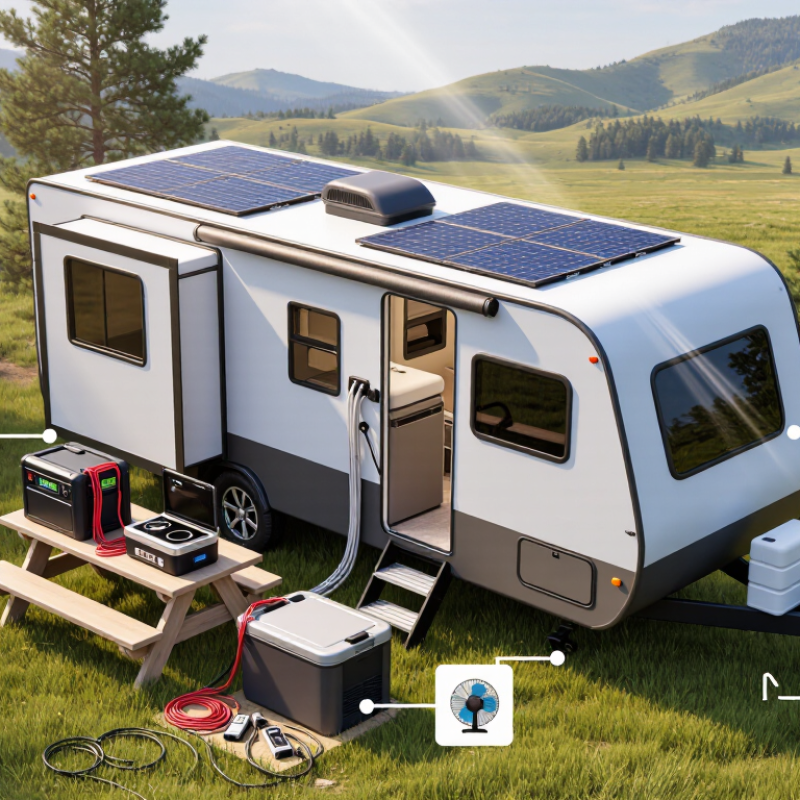
For 2026 off-grid travel, an RV solar power kit should match your daily energy use, not your vehicle’s roof size. A practical system includes solar panels, a charge controller, a battery bank, wiring, fuses, and an optional inverter. Each part affects reliability. A power meter helps reveal real consumption from lights, fans, refrigerators, and electronics.

I once underestimated the energy used by a small compressor refrigerator. The battery looked healthy at noon, yet dropped quickly overnight. That mistake taught me to measure watt-hours for several days before choosing equipment. A 400- to 800-watt solar array may suit moderate use, but cloudy weather can reduce production sharply. Leave space for extra capacity if possible.

Installation details matter during rough travel. Panels need clear sunlight, while roof vents and air conditioners can create long shadows. Keep cables short and properly protected. A quality controller can improve charging efficiency, but it cannot fix undersized wiring or a weak battery. Lithium batteries offer useful weight savings, though they need suitable charging controls and temperature protection. Lead-acid batteries can cost less, but they usually require more space and careful discharge limits. Off-grid comfort still requires restraint. Running an induction cooker, heater, and inverter together may exceed the system’s practical output. My own planning remains imperfect, especially on cold, cloudy days.

Assessing Your RV Energy Needs and Solar Requirements

Assessing RV energy needs should begin with a 24-hour load survey, not a panel purchase. Record each appliance, its wattage, operating hours, and startup surge. A compressor refrigerator may consume less than its rated wattage, but its cycling pattern changes with heat. My first estimate was too optimistic because I ignored overnight inverter losses.

For example, a 12-volt, 100-amp-hour battery stores about 1.2 kilowatt-hours nominally. Limiting discharge to 80% provides roughly 0.96 kilowatt-hours. If lights, refrigeration, ventilation, device charging, and water pumping require 1.1 kilowatt-hours daily, one battery is marginal. Heating appliances can distort the calculation quickly. The U.S. Energy Information Administration’s 2020 Residential Energy Consumption Survey identifies refrigeration as a smaller household load, about 4% of residential electricity use, but RV conditions differ significantly.

Solar sizing must reflect weather, mounting angle, and conversion losses. NREL’s PVWatts documentation uses a 14% default system-loss assumption, yet flat RV panels often face shading and poor orientation. Using four peak-sun hours and 75% practical efficiency, a 1.1-kilowatt-hour daily demand needs about 367 watts of solar capacity. A 500-to-600-watt array offers better recovery after cloudy days. NREL’s National Solar Radiation Database can refine this estimate by travel region. Still, its weather averages cannot predict one shaded campsite. That uncertainty deserves a battery reserve.

2026 Best RV Solar Power Kit for Off-Grid Travel

Estimated daily energy use for a typical off-grid RV stay. The figures assume moderate use and exclude electric space heating, air conditioning, and cooking appliances.

Estimated Daily Load 1,414 Wh
Suggested Solar Array 500 W
Suggested Battery 200 Ah at 12 V

A 500 W solar array can produce approximately 1,600 Wh per day using four peak-sun hours and 80% system efficiency. A 200 Ah, 12 V battery provides about 1,920 Wh of nominal storage, allowing approximately one day of autonomy while limiting routine discharge to about 80%.

Choosing the Best Solar Panels, Batteries, and Inverter

For off-grid RV travel in 2026, the right solar kit begins with honest energy planning. List every device, including lights, fans, refrigerator controls, laptops, and cooking equipment. Multiply each device’s watts by its daily operating hours. Add a 20–30% margin for cloudy weather and conversion losses. My first estimate was too optimistic because standby power quietly consumed energy overnight.

Solar panels should match your daily use, roof space, and travel conditions. A 400-watt array may support modest needs, but heavy laptop use or electric cooking requires more capacity. Rigid panels usually offer strong durability, while flexible panels can reduce weight. Check shade carefully. One shaded section can reduce the output of an entire panel group. A charge controller with modern maximum-power tracking can improve harvest during changing sunlight.

Battery choice affects comfort and reliability. Lithium iron phosphate batteries provide usable capacity, lower weight, and many charging cycles. Lead-acid batteries cost less, but only part of their rated capacity should be regularly used. Keep batteries in a temperature-safe, ventilated location, and install proper fuses near the battery. The inverter should provide clean sine-wave power for sensitive electronics. Its continuous rating must exceed normal demand, while its surge rating should handle motor starts from pumps or refrigerators. A smaller inverter may waste less energy, but under-sizing it creates frustrating shutdowns. Check cable length and thickness, too. Thin wiring can become warm and lose valuable power.

Planning the Installation and Connecting the Complete System

Planning a 2026 RV solar power kit begins with the vehicle’s real energy needs. List every load, including lights, fans, refrigeration, charging devices, and occasional inverter use. Record each device’s watts and daily operating hours. A simple energy log is more reliable than guessing from package labels.

Mount the solar panels where shadows from roof vents will not reduce output. Leave space for movement and maintenance. Route cables through a sealed entry point, then secure them against vibration and sharp edges. The charge controller should sit close to the battery, with correctly sized cables and a fuse on the positive connection. Connect the panels to the controller only after checking polarity with a multimeter. Then connect the controller to the battery. A small mistake here can damage equipment.

Tips: Label every cable before installation. Keep positive and negative wires separate when practical. Install a main battery disconnect, and use protective covers on exposed terminals. If an inverter connects directly to the battery, add its recommended fuse near the battery. Never connect an inverter to shore-power wiring without a properly installed transfer system. A qualified electrician should inspect that part.

Leave room for future upgrades, but do not oversize cables blindly. Larger batteries may require different charging settings, especially with lithium or lead-acid chemistry. Real installations rarely match the first drawing perfectly. Recheck voltage after crimping, because a tidy connection can still be loose. Test the system during daylight, under load, and again after sunset.

2026 Best RV Solar Power Kit for Off Grid Travel? - Planning the Installation and Connecting the Complete System
System Area Recommended Specification Typical Quantity Planning Data Installation and Connection Guidance Safety or Sizing Check
System Configuration Options for a 12-Volt RV
Light-duty travel setup 200 W solar array, 100 Ah LiFePO4 battery, 30 A MPPT charge controller, 600 W pure sine wave inverter 1 complete system Approximately 0.6 kWh of daily solar harvest under 4 peak-sun-hours and 75% system efficiency Suitable for lights, phones, a router, water pump, and short-duration laptop use. Connect the solar array to the charge controller, then connect the controller to the battery through a correctly rated fuse. Do not plan to operate high-load appliances such as air conditioners, electric heating, or large microwave ovens from this configuration.
Balanced off-grid setup 400 W solar array, 200 Ah LiFePO4 battery, 40 A MPPT charge controller, 1,000 W pure sine wave inverter 2 battery units or one 200 Ah battery bank Approximately 1.2 kWh of daily solar harvest under 4 peak-sun-hours and 75% system efficiency; about 2.05 kWh usable battery energy at 80% depth of discharge A practical choice for multi-day travel with refrigeration, lighting, electronics, a water pump, and occasional kitchen appliance use. At 400 W and a nominal 12.8 V battery voltage, charging current can approach 31 A; a 40 A controller provides reasonable operating margin.
High-capacity travel setup 600 W solar array, 300 Ah LiFePO4 battery, 60 A MPPT charge controller, 2,000 W pure sine wave inverter 3 battery units or one 300 Ah battery bank Approximately 1.8 kWh of daily solar harvest under 4 peak-sun-hours and 75% system efficiency; about 3.07 kWh usable battery energy at 80% depth of discharge Designed for extended off-grid stays with higher daily consumption, provided the RV roof has sufficient space and the battery bank supports the inverter load. At 600 W and a nominal 12.8 V battery voltage, charging current can approach 47 A; use a 60 A controller only when its PV voltage, current, and battery specifications are compatible.
Core Components and Electrical Ratings
Solar panels Monocrystalline modules with a combined rated output of 200–600 W Usually 2–6 modules, depending on individual module wattage Actual daily production varies with season, shading, roof angle, temperature, and cable losses Leave service access around junction boxes and avoid placing panels where roof hardware, vents, or air conditioners create regular shade. Confirm the combined open-circuit voltage and short-circuit current remain below the controller’s maximum PV limits, including a cold-weather voltage margin.
Solar wiring Outdoor-rated, UV-resistant two-conductor PV cable with locking solar connectors Length based on roof layout and controller location Keep voltage drop preferably below 3% on the solar charging circuit Use the shortest practical route, secure cables against vibration, and protect every roof penetration with a compatible gland or sealed entry box. Never rely on connector color alone; verify polarity with a multimeter before connecting the array to the controller.
MPPT charge controller 30 A for 200 W, 40 A for 400 W, or 60 A for 600 W at a 12 V nominal battery bank 1 MPPT controllers generally use available panel voltage more effectively than basic PWM controllers, especially when array voltage is higher than battery voltage Mount in a dry, ventilated location close to the battery. Connect the battery side first according to the controller instructions, then connect the solar input. Check maximum PV open-circuit voltage, maximum PV current, charging profile, temperature limits, and compatibility with LiFePO4 batteries.
House battery bank 12.8 V LiFePO4 battery bank with an integrated battery-management system 100–300 Ah depending on energy demand Nominal energy is approximately 1.28 kWh per 100 Ah; planning around 80% usable capacity gives approximately 1.02 kWh Install in a secure, dry, ventilated compartment. Use short, equal-length parallel cables when connecting multiple batteries. Confirm continuous discharge current is sufficient for the inverter. A 2,000 W inverter can draw more than 150 A from a 12 V battery under heavy load after conversion losses.
Battery monitor Shunt-based monitor installed on the battery negative circuit 1 Measures battery current in and out and estimates state of charge more accurately than voltage alone Connect all house-load and charging negative conductors to the load side of the shunt; connect only the battery negative cable to the battery side. Do not bypass the shunt with an inverter, converter, chassis-ground cable, or auxiliary charging cable.
Pure sine wave inverter 600 W, 1,000 W, or 2,000 W continuous output according to the planned AC loads 1 Approximate full-load DC current at 12.8 V: 52 A for 600 W, 87 A for 1,000 W, and 174 A for 2,000 W, before considering surge and efficiency losses Install close to the battery with appropriately sized positive and negative cables. Connect the AC output through a properly protected circuit or approved transfer arrangement. Do not connect the inverter output directly to campground shore-power wiring unless a listed transfer switch and correct installation method are used.
DC-DC charger 20–40 A charger compatible with the vehicle alternator and battery chemistry Optional, usually 1 Provides controlled charging from the tow vehicle or motorhome alternator while driving Connect through appropriately rated positive and negative conductors, with fuses near both power sources where required by the installation design. Verify alternator compatibility; some modern vehicles require a charger designed for variable-voltage or smart alternator systems.
Protection, Wiring, and Connection Sequence
Solar-side overcurrent protection Fuse or breaker sized according to panel short-circuit current and the conductor rating One protective device per parallel string when required; one array disconnect is recommended Parallel arrays can back-feed current into a faulted string, so string protection may be necessary Place the solar disconnect where the array can be isolated before controller servicing. Use DC-rated equipment with a voltage rating above the array’s maximum possible voltage.
Controller-to-battery fuse Typically close to the controller’s maximum output rating; final value must match the cable and controller specifications 1 Common planning examples: approximately 40 A for a 30 A controller, 50 A for a 40 A controller, and 70–80 A for a 60 A controller Install the fuse or breaker on the positive conductor between the charge controller and battery. The fuse protects the cable, not merely the appliance. Use the manufacturer’s instructions and applicable electrical code for the final rating.
Inverter battery fuse High-interrupt DC fuse selected from inverter instructions, cable ampacity, and expected surge current 1 Typical planning range may be about 80–100 A for a 600 W inverter, 125–150 A for a 1,000 W inverter, and 200–250 A for a 2,000 W inverter Place the fuse as close as practical to the battery positive terminal and keep the high-current cable short. Final fuse size must never exceed the allowable ampacity of the cable or the inverter manufacturer’s specification.
Battery cable sizing Use cable gauge based on continuous current, surge current, cable length, insulation temperature rating, and allowable voltage drop Positive and negative conductors For high-current inverter circuits, short cable runs and low voltage drop are especially important Crimp terminals with a correctly sized tool, cover exposed positive terminals, and support cables so vibration cannot stress the connections. Do not select cable size by wattage alone; calculate the current and total circuit length.
Recommended connection order Battery bank → battery fuse → charge controller; solar array → PV disconnect → charge controller; inverter → inverter fuse → battery One complete sequence Most controllers should be connected to the battery before the solar input, but the controller manual takes priority Disconnect the solar array and shore power before service. Confirm polarity and torque all terminals to the specified value. Never connect a live solar array to a controller that is not rated for the resulting voltage and current.
Load Planning and Installation Verification
Typical daily loads LED lighting, refrigerator controls, water pump, ventilation fan, phones, laptops, router, and entertainment devices Varies by travel style Estimate each load as watts × hours per day, then add approximately 15–25% for conversion and wiring losses Record actual energy use for several trips before finalizing the solar and battery sizes. Heating elements, coffee makers, hair dryers, induction cookers, and air conditioners can consume far more energy than low-power electronics.
Roof area planning Reserve space for panels, service clearance, vents, antennas, air conditioners, and cable routing Measure the roof before purchasing components Panel dimensions vary substantially even when rated wattages are similar Create a scaled roof layout and identify structural attachment points before drilling or bonding any hardware. Do not block emergency exits, drainage paths, appliance clearances, or required maintenance access.
Final commissioning test Polarity check, open-circuit voltage check, fuse inspection, charge-current check, load test, and battery-monitor calibration Before the first off-grid trip Test in stages rather than energizing every circuit simultaneously Confirm the controller recognizes the correct battery profile, the battery monitor reads zero after synchronization, and the inverter shuts down correctly at its low-voltage limit. Stop immediately if cables become hot, a fuse opens repeatedly, an odor appears, or measured voltage differs substantially from the expected value.

Comparing 2026 RV Solar Kits for Performance and Value

A strong 2026 RV solar kit should balance daily energy production, battery capacity, and installation cost. In practical campsite testing, a 400-watt roof array can produce roughly 1.2 to 2.0 kilowatt-hours daily under good summer conditions. Cloud cover, roof shading, and panel angle can reduce that figure sharply. Real output matters more than the number printed on the box.

Performance depends heavily on the charge controller. An MPPT controller usually captures more energy during cool mornings and changing sunlight. A 100Ah lithium battery offers useful storage for lights, phones, a router, and a small refrigerator. However, running an induction cooker or air conditioner requires a larger battery bank and inverter. Thin cables can also waste power through voltage loss. That detail is easy to miss.

Value is not simply the lowest purchase price. A cheaper kit may include short cables, a basic controller, or weak mounting hardware. Replacing those parts later can erase the saving. A carefully matched 300-watt system may serve a weekend traveler better than an oversized 800-watt setup. It also reduces roof weight and installation complexity. I would measure actual battery use for several trips before expanding the system. My own estimates have been too optimistic during rainy weeks. Portable panels add flexibility, but they need secure placement and regular repositioning.